Quick answer
You do not need a camera. A modern phone plus roughly £60 to £150 of kit (a small tripod, a folding reflector and a cheap LED panel) gets you 90% of the way, and the remaining 10% is discipline, not equipment. A professional half-day shoot costs around £300 to £600 and is worth it for a handful of flagship jobs. The habit that matters most costs nothing: take the “before” photo every time, before you touch anything.
Why your own photos beat anything you can buy
Trades sell something the customer cannot inspect in advance and often cannot judge afterwards. Your photographs are the only evidence of workmanship they will ever see before committing. That makes them the highest-leverage marketing asset in the business, and it is why stock photography of somebody else’s kitchen actively damages a trade website. Customers can tell, and the moment they suspect the pictures are not yours, they start wondering what else is not.
Real job photos do a lot of work at once. They fill the website gallery and the quote document, they feed the photo section of a Google Business Profile, and they give you social posts for free, forever. They also let you charge more, because a portfolio of visibly tidy, finished work is the best answer to “why are you more expensive than the other quote?”. The trade-off between real and stock imagery is covered in more depth in our guide to real photos versus stock images.
The six-shot checklist for every job
Systems beat inspiration. If you shoot the same six frames on every job, you end up with a consistent library instead of a camera roll you cannot use. Do it in this order:
- The wide “before”. Taken before a single tool comes off the van. Note where you stood. You will need to stand there again. This is the shot everybody forgets, and without it the “after” is just a photo of a room.
- The wide “after”, from the same spot. Same position, same height, same lens. Matching pairs are dramatically more persuasive than two unrelated photos of the same space.
- The mid shot. A section of the finished work: one run of units, one section of roof, one wall of tiling. This is what people actually study.
- The detail. A close, well-lit frame of the bit you are proud of: a mitre, a grout line, a cable run, a joint. Detail shots are what separate a tradesperson from a bodger in a customer’s mind.
- The in-progress shot. First fix, the joists exposed, the substrate prepared. Nobody else can show this and it proves what is under the surface, hugely valuable for quotes where you are being undercut.
- The context shot. The finished work sitting in its setting (the room in use, the house from the kerb). Gives scale and stops the gallery feeling clinical.
Six frames takes about four minutes, and produces enough material for a website case study, a month of social posts and a page in your quote pack.

The kit, and what it actually costs
| Item | Typical UK cost | What it fixes |
|---|---|---|
| Microfibre cloth | £3 | Your phone lens is covered in dust and thumbprints. This is the highest-return purchase on the list. |
| Small tripod or clamp | £15 to £40 | Matching before/after framing, straight verticals, and sharp shots in dim rooms |
| Folding reflector (5-in-1, 60cm) | £15 to £30 | Bounces window light into dark corners; kills the shadow that ruins detail shots |
| Rechargeable LED panel | £30 to £70 | Lofts, cupboards, under-sink, plant rooms and winter afternoons |
| Bin bag and a dustpan | £2 | Genuinely the difference between a usable photo and a wasted one |
Total: comfortably under £150, and it lasts years. A professional is not a competitor to this kit. It is a different tool for a different job, covered below.
Light is the whole game
Nearly every bad trade photo is a lighting problem wearing a different costume. Five rules cover most of it:
- Put the light behind you, not behind the subject. Shooting toward a window turns the room into a silhouette. Stand with the window over your shoulder, or shoot from the window side of the room.
- Bright overcast is the best weather you will get. Cloud is a giant softbox. Harsh midday sun creates black shadows and blown highlights no editing recovers; outdoors, early morning or the hour before sunset is worth the wait.
- Turn every light on, then expose for the window. In interiors, switching on all the room lights lifts the shadows enough that the view outside stays visible instead of turning into a white rectangle.
- Avoid mixed colour temperatures where you can. Warm bulbs plus cold daylight plus a green-tinted worklight gives you a photo nothing can fix. Turning the worklight off is usually the answer.
- For exteriors and signage, dusk is the cheat code. The twenty minutes after sunset, with lights on inside, makes an ordinary building look expensive.
Phone settings and framing
- Clean the lens. Again. It is in your pocket all day next to plaster dust.
- Turn the grid on. It is a setting in the camera app, it takes ten seconds, and it makes level horizons and straight verticals almost automatic. Wonky verticals are the single most common tell of an amateur photo.
- Tap to set focus, then drag to set exposure. Tapping the brightest part of a room and pulling exposure down slightly usually beats whatever the phone chose.
- Use the main lens, not the ultra-wide, unless you have to. Ultra-wide (the 0.5× option) bends straight lines at the edges: it will bow a straight worktop or a plumb wall. In tight rooms it is unavoidable; step back into a doorway first if you can.
- Never pinch to zoom. Digital zoom just crops and softens. Walk closer.
- Shoot landscape and portrait. The website wants landscape; social wants portrait. Two taps at the time beats a bad crop later.
- Shoot from chest height, not eye height. Slightly lower framing makes interiors look more spacious and stops floors dominating.
Tidy the frame: the mistake that ruins most trade photos
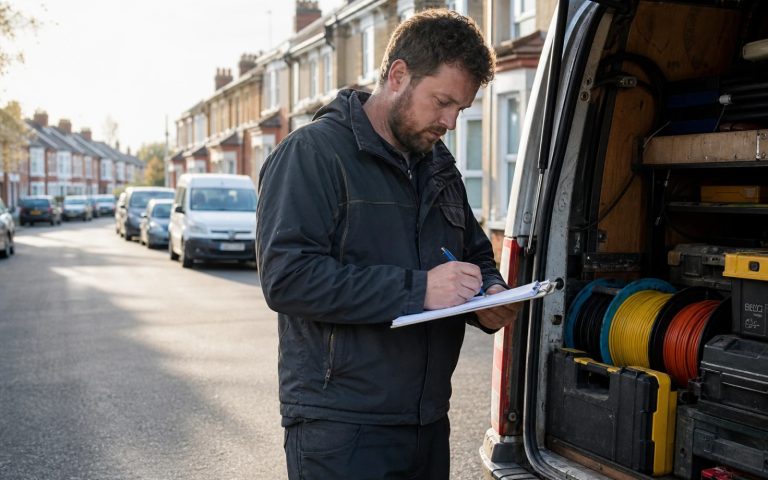
The most common reason a photo of excellent work looks bad is everything else in the shot. Before you press the button, run a five-second sweep: tools, offcuts, cable drums, dust sheets, packaging, mugs, the customer’s washing, the wheelie bin, your open van door, a stray sock. Straighten what is meant to be straight, close cupboard doors, coil the hose, and take the covers off. Photographing your own work honestly means photographing the finished state, not the state ten minutes before the finished state.
Other frequent errors: shooting the “after” from a different angle to the “before”, so the comparison collapses; shooting only close-ups, so nobody can tell what the job was; and leaving the flash on indoors, which flattens everything and glares off tiles and glass.
Permission, privacy and number plates
You are taking photographs inside and outside other people’s homes, so handle it properly, which protects the relationship as much as anything else.
- Ask, and get it in writing once. A single line on your job sheet or terms (“we may photograph completed work for our portfolio and marketing; tell us if you would prefer we did not”) with a tick box handles it for every job. Ask again verbally before you shoot the interior.
- Keep identifying detail out. House numbers, street signs, vehicle number plates, post on the hall table, family photographs on the wall, and children. Reframe or crop; do not rely on nobody noticing.
- Commercial sites have their own rules. Many contractors, landlords and public-sector clients prohibit site photography or require sign-off before publication. Ask the site manager, not the client’s receptionist.
- Personal data still applies. Photographs that identify a person or a specific household are personal data, so store them sensibly and delete what you do not use. The ICO’s guidance for organisations is the plain-English source if you want to check.
Making a camera roll look like one brand
A gallery of thirty photos taken in thirty different ways looks chaotic even when every photo is good. Three habits fix it:
- Edit them the same way. Pick one light edit (a small lift in exposure and contrast, straighten, crop) and apply it to everything. Free phone apps do this fine. Resist heavy filters; customers are trying to judge a colour of grout or a shade of oak.
- Watermark lightly, if at all. A small logo in a bottom corner at reduced opacity is enough to survive a screenshot. A big centred logo across the middle just makes your work harder to see. This is where owning white and dark versions of your logo matters, because one of them will always contrast with the floor or the wall.
- Name and file them properly. One folder per job, dated, with the customer’s town in the name, backed up to cloud storage the day you shoot. Resize before uploading: 1,600 to 2,000 pixels wide is plenty, and a 6MB phone photo will slow your site badly.
Consistency across social channels follows the same logic as consistency across print and vehicles. Our guide to looking like one brand on social media covers the templates side, and the photos are what fill them.
Where the photos should end up
Shooting them is half the job. Put them to work: a case study on the website for each significant job (before, after, the problem, what you did); regular uploads to your Google Business Profile, which is free and badly under-used by trades; a small selection in the quote document, so the customer is looking at your work while reading your price; and the strongest three or four on the homepage. If you also film, the same discipline applies; see our phone-first video guide.
When to pay a professional
Do it for the jobs that will sell the next fifty: a flagship kitchen, a full renovation, a showroom, a commercial fit-out you want more of. A half-day shoot at roughly £300 to £600 buys properly lit, properly composed images with straight verticals and controlled colour, pictures that can carry a homepage or a tender document. Book it for a job that is finished, styled and empty of vans, and get a licence covering your website and social channels in writing.
For everything else, your phone and the six-shot checklist are genuinely enough. The firms with the best trade portfolios in Britain are almost never the ones with the best cameras. They are the ones who took the “before” photo on every job for three years. If your brand is not yet ready to carry those photos, branding for trades businesses covers what to sort first.
Get the UK SME Marketing Budget Worksheet (free)
A printable worksheet for setting a realistic UK marketing budget and splitting it across SEO, paid ads, content and email.
No spam. UK GDPR compliant. We only use your email to send this resource, unless you tick the box to hear from us.
Sources & Further Reading
- Data protection guidance for organisations, Information Commissioner's Office
- Add photos to your Business Profile, Google
- Marketing and advertising: the law, GOV.UK
Frequently asked questions
Do I need a proper camera to photograph my own work? +
No. A modern smartphone plus about £60 to £150 of kit (microfibre cloth, small tripod, folding reflector and a rechargeable LED panel) covers almost every job. Discipline matters far more than equipment: consistent framing, clean light and a tidy frame.
What photos should I take on every job? +
Six: a wide "before" from a noted position, the matching wide "after" from the same spot, a mid shot of the finished section, a close detail of the workmanship, an in-progress shot showing what is under the surface, and a context shot of the work in its setting.
How much does a professional trade photography shoot cost in the UK? +
Roughly £300 to £600 for a half day and £600 to £1,200 for a full day in 2026, depending on location and the photographer. It is worth it for flagship jobs, showrooms and commercial fit-outs you want more of, not for routine work your phone can cover.
Do I need the customer's permission to photograph their home? +
Yes, and it is best handled in writing once: a line and a tick box on your job sheet or terms covering portfolio and marketing use, then a verbal check before shooting interiors. Keep house numbers, number plates, post, family photographs and children out of frame.
Why do my photos look worse than the work does? +
Usually light and clutter. Shooting toward a window silhouettes the room, harsh midday sun blows out highlights, and mixed bulb and daylight colours cannot be corrected afterwards. Then there are the tools, offcuts and dust sheets left in shot; clear the frame before you press the button.